
Hanging guide
Hang it yourself, in an afternoon.
Our murals and wallpapers are paste-the-wall: no soaking, no paste table. Here is everything you need, step by step, from bare wall to finished room.
- Paste the wallThe paper stays dry and easy to handle
- Numbered panelsHang them in order, from left to right
- 4 in extra on every sideRoom to adjust, then trim
- About an afternoonFor an average wall, at a calm pace
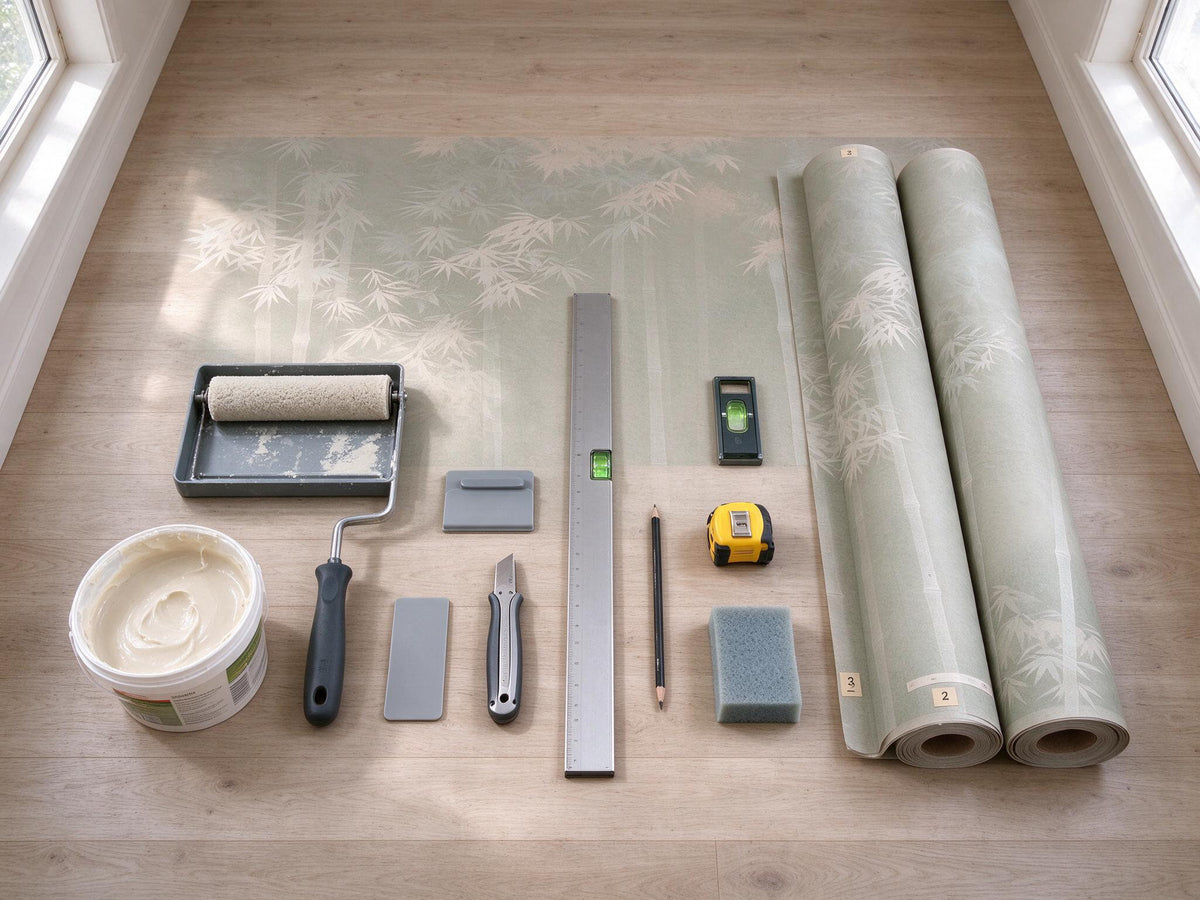
What you need
A few simple tools
- Ready-mixed wallpaper paste (for non-woven, or for vinyl if you chose Washable)
- A short-pile paint roller and a tray
- A plastic smoother or a smoothing brush
- A sharp snap-off cutter and a wide metal straight edge
- A spirit level, a pencil and a tape measure
- A clean sponge and a bucket of water
- A step ladder
Before you start
Prepare your wall and your panels
A clean, smooth wall
The wall must be clean, dry, smooth and evenly colored. Fill holes, sand rough areas, and let fresh paint or plaster dry completely.
Outlets and switches
Turn off the power and unscrew the cover plates. You will hang over them, then cut the opening and screw the plates back on.
Lay out your panels
Unroll every panel and lay them out in order on the floor. Check the numbers, the sizes and the print before you paste anything.
Step by step
From bare wall to finished room
-
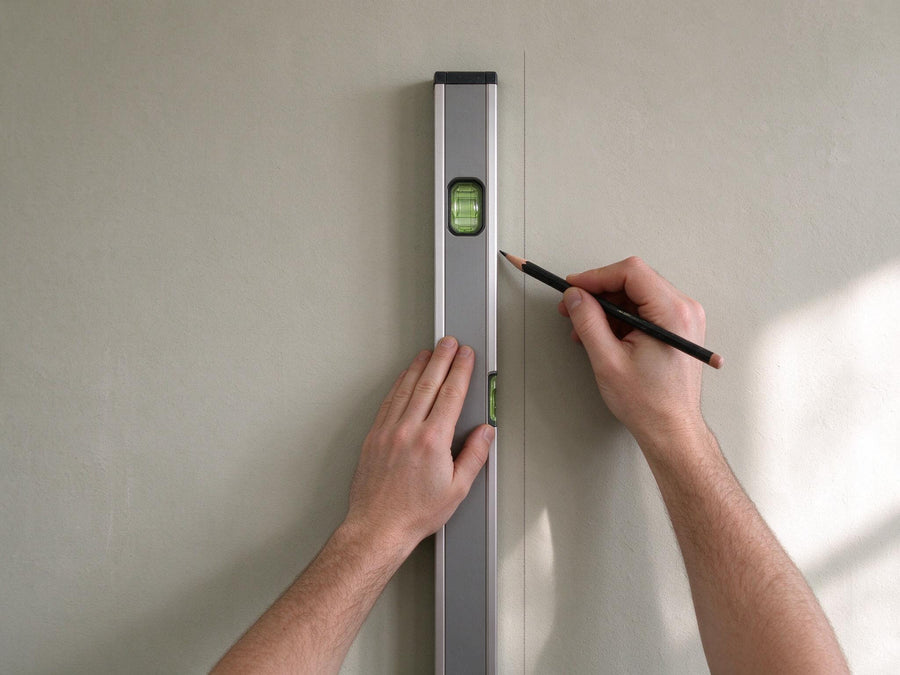 1
Draw a vertical line
Hold a spirit level against the wall, about one panel width from the left corner, and draw a fine pencil line. It keeps every panel straight, even if your corner is not.
-
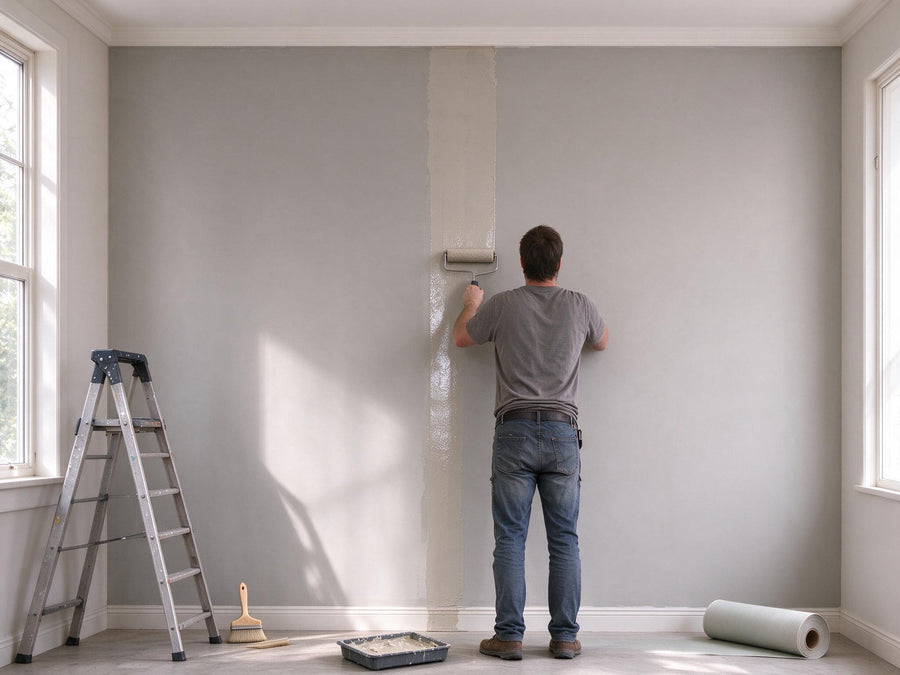 2
Paste the wall, not the paper
Roll ready-mixed paste evenly onto the wall, over a band a little wider than one panel. The paper stays dry: no soaking time, no mess.
-
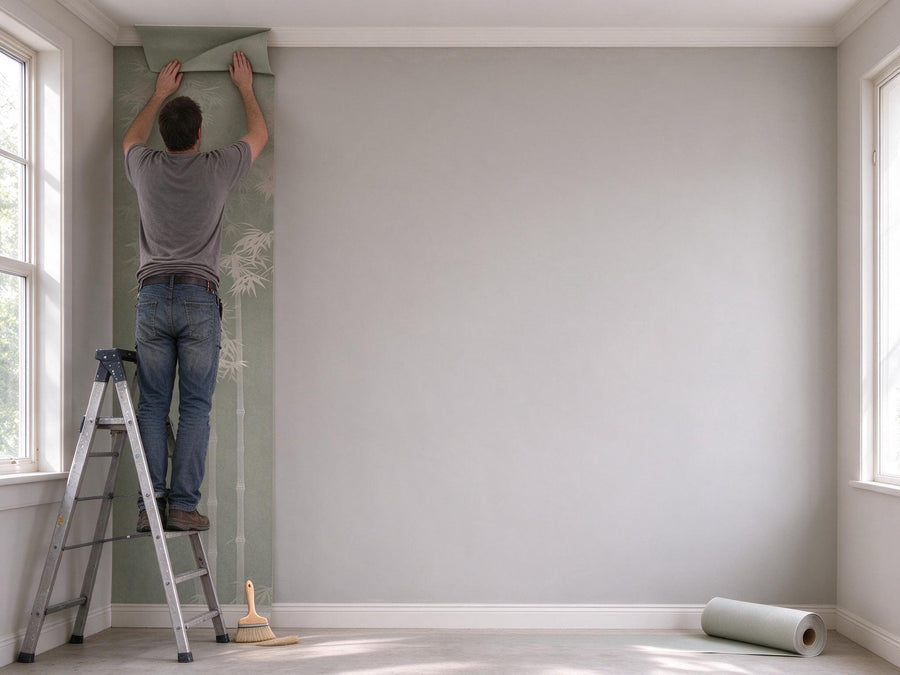 3
Hang panel 1 along your line
Start with panel 1, its edge on your line. Let the extra paper run over the ceiling, the corner and the baseboard: it is there for that, you trim it at the end.
-
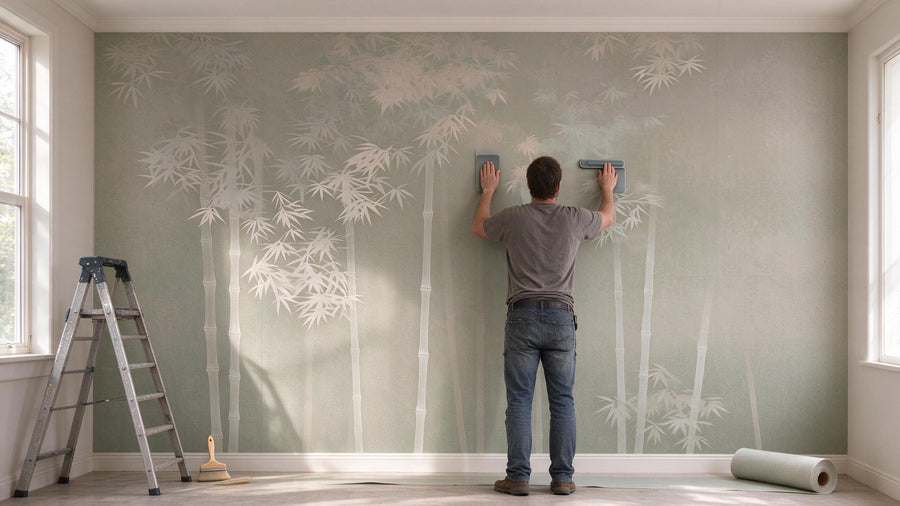 4
Hang the next panels edge to edge
Follow the numbers from left to right. Butt each panel against the previous one, without overlapping, and smooth from the center towards the edges to push out air bubbles.
-
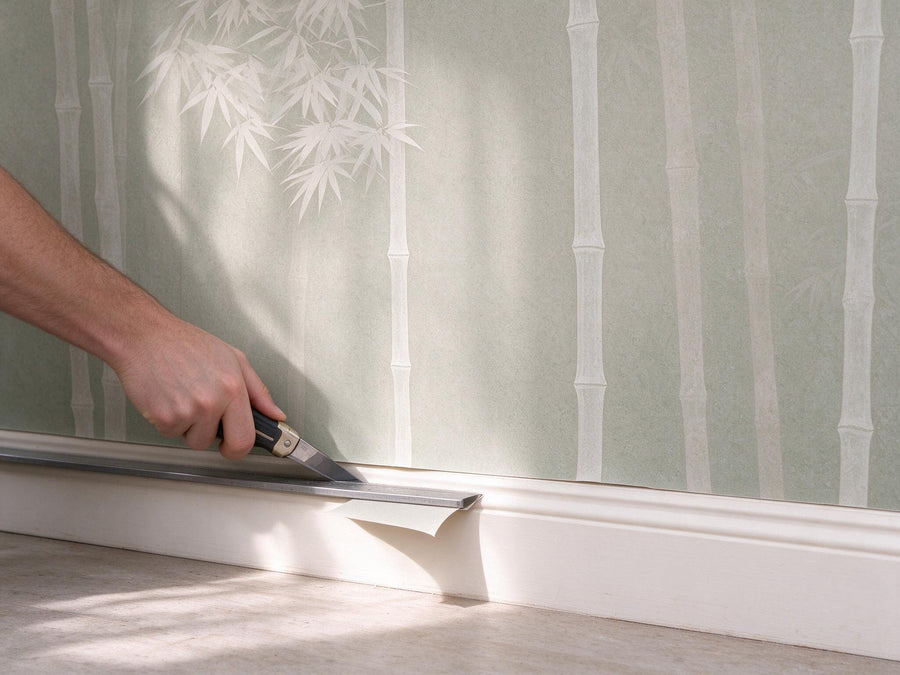 5
Trim the excess
Press a wide straight edge into the angle at the ceiling and the baseboard, and cut along it with a sharp blade. Snap off a new blade segment often for a clean cut.
-
6
Wipe and let it dry
Wipe any paste off the surface with a clean, damp sponge as you go. Then let the wall dry for 24 to 48 hours, at room temperature, without drafts or a heater pointed at it.
Small bubbles in the first hours are normal: they disappear as the paste dries.
Tips from our team
The details that make a clean result
Good to know
By product
Wallpaper rolls
Check that all your rolls have the same batch number. Line up the pattern from one strip to the next before smoothing, and keep the pattern match in mind when you cut each strip.
Wall cloth
Our wall cloths are 2.80 m (110 in) high and hung sideways in one long length, for a wall without vertical seams. It is a two-person job: we recommend a professional decorator.
Atelier
Hand-embroidered pieces are heavy and precious. We recommend having them hung by a professional decorator used to textile wallcoverings.
Later on
Removing it, when the time comes
Classic Matte is a non-woven paper: it peels off dry, in full strips, without steaming. For the other papers, moisten the wall with warm water and a little wallpaper stripper, wait a few minutes, then peel.
Wash off any paste left on the wall with warm water before painting or papering again.
A question while hanging?
Write to us with your question, and we will help you finish your wall. We reply within 24 to 48 hours, Monday to Friday. And if a panel arrives damaged or faulty, tell us within 3 days of delivery: our Reprint Guarantee covers you.